Showing posts with label chair. Show all posts

Thursday

Chair love {part 764}

I love chairs.  The end.


Okay, I love chairs and shoes that make me tall(er).
Wait, I don't mean chairs that make me taller.... nevermind.

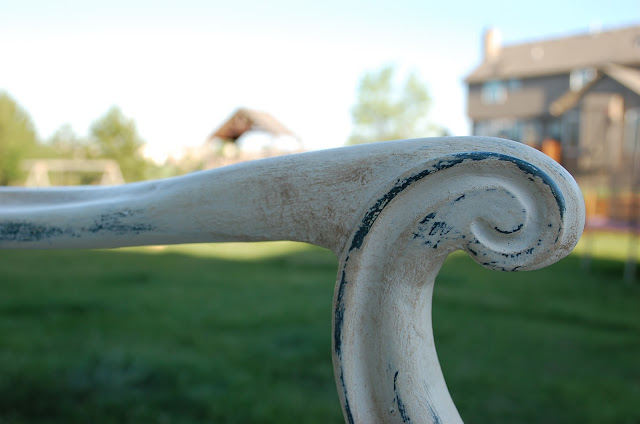
  ooops, not a true before, but can you see that lovely green color that the frame used to be?  Yikes!  
(Yes, I still paint in the dining room, despite what can happen!)

But shoes are shoes.  For the most part you can't update them.  You can't repaint or reupholster or redesign them.

 Don't you love the legs on these girls?  I scored 4 of them!

  So, I guess I love chairs more than shoes.  There.  I said it.  


I've always been rebellious.  Don't try to stop me.


And I'm over the moon about these, my newly "deconstructed" chairs!!


Linking here:
Furniture Friday at Decorating Insanity
What Have You Redone? at Redoux
Fridays Unfolded at Stuff and Nonsense
Feathered Nest Friday at French Country Cottage
Furniture Feature Friday at Miss Mustard Seed
Saturday Night Special at Funky Junk Interiors
Get Schooled Saturday at Too Much Time On My Hands
Weekend Craft Soiree at Homemaker in Heels
Sister Sunday Link Party at Sisters of the Wild West 
DIY Project Parade at DIY Showoff
Trash to Treasure at Kammy's Korner
Piece of Work Wednesday at Primitive and Proper
Restored it Wednesday at Restore Interiors


Saturday

Whole Lotta Sittin' Goin' On


 If you've been with me very long, you know that I have an obsession with chairs.   

 I found 3 of these gorgeous shield back chairs in a little antique store in the town my parents live in.
Do. Not. Go. There.  It's a hidden gem and I don't want to have to wrestle you to the ground for any of the good stuff!


The first one got a glossy black paint job and a little French love poem, hand written by my sister.
(I'm keeping this one for myself!)


The second chair now has a sunny disposition! (This one is going in the shop!)


The third sister is yet to get her make-over!


Alright, once again, no true before photos.  Sometimes I'm like a kid on Christmas when I have a new project!  I can't wait to get started!!


This chair got a good cleaning with TSP and then a light sanding.  I used 2 coats of Annie Sloan Greek Blue, then dark and clear waxes.


One of the things I loved most about this chair was its original leather seat.  But, it was dull and brown and no amount of leather cleaner, polish, or wax would liven it up.  So, I bought a fun paisley to bring it to life!  (I left the leather intact underneath just in case)


Next in line for an update was this cute little vanity bench!  It didn't need much other than to remove the old fabric and replace it.  I also added another touch of blue, which seems to be my favorite color of late!


I also gave the wood a good wax and buff (which is similar to what I get at the salon, right? - ha!)


The makeovers are finished for today!

Linking here:


Aged Wood Table (and a tutorial)

Like?

Once it was this...
...along with 2 chairs at a tag sale, I think it's safe to say it  begged me to take it home!
I painted the legs a dark teal and then sanded the ugly top until my arms nearly fell off.

I can rock some 80's hair and seriously love me some 80's music, 
but I CANNOT do 80's orange oak.   
(so I did this...)

 
To get the look
of aged wood:

things you'll need:
sanded/bare wood
tea (about 6 bags)
glass jar with lid
steel wool
vinegar (2 to 3 cups)
disposable bowl or paint tray
old paintbrush
Minwax Polycrylic for finish


1) Sand or strip the wood so that it's completely bare and free of paint, stain, or sealer.

2) Make the "wash" that will age the wood.  Use a glass jar with a lid (I used and old pasta sauce jar).  Add a steel wool pad and cover it completely with vinegar.  Let this mixture sit in a jar and bubble for 2 days.

 
3) Next, stain your wood with tea.  I used 6 teabags for this and had some left over, it doesn't take much for a tabletop this size.


Here's what it looked like after I'd done about half with the tea stain.  I ended up giving it 2 coats of tea.


4) Once the table is dry, pour the vinegar mixture in a disposable bowl and use and old paintbrush to wash your wood with the mixture. *WARNING: SMELLS BAD*  Try to coat it evenly.  As it dries it'll darken and you'll begin to see the beauty of the grain and a lot of variation in the color.  Presto Chango!


The first coat left it dark and really dry/chalky looking.  I did a second coat (outdoors, at the request of my nose) and after a few minutes it looked like this.


3) I sanded lightly with a fine sanding block to get rid of any bubble marks.


4) Once it was completely dry, I sealed the top using a very light coat of Minwax Polycrylic.  Make sure to use the best brush to minimize the brush strokes and to avoid "pulling" of the finish.

The end result is a deep, warm charcoal color that looks different in every light!

 
I decided to repaint the table legs and chairs antique white to let the top really stand out.


Then I added a beautiful transfer courtesy of The Graphics Fairy, and finished with another coat of Polycrylic.


Remember the before?

The afters (cloudy day)

(Sunny day)
 

Tips to getting this look:
- make sure your steel wool is STEEL!
- use a glass jar - I used an old pasta sauce jar and it made about plenty.
- make sure the steel wool is completely covered by the vinegar, unless you're also wanting to add a rust color.
- this is a stain.  It left stains on my hands and floor (not permanent luckily) but be careful.
- don't wipe the wood down with a WET cloth after sanding, or you'll have to rewash it with the mixture. (trust me)
- the mixture is really smelly.  I thought since it was basically an all-natural method I could do it indoors, but it's clearly a chemical reaction not to be messed with. The smell made me gag (not kidding)!
- various vinegars and various wood types will produce different colored results. (I've been experimenting! More aged wood projects to come.)
 

I'd love to see the end result if you're trying this!  Send me your pictures and I'll update this post with them!


My table was featured here!!!  Yay!!
Shine Your Light

Linking this tutorial here:
DIY Club The Graphics Fairy Ninth Street Notions Photobucket Tip Junkie handmade projects HookingupwithHoH Photobucket Photobucket shabby creek cottage Furniture Feature Fridays Redoux Chic on a Shoestring Decorating Funky Junk's Sat Nite Special
One Project Closer

LinkWithin

Related Posts Plugin for WordPress, Blogger...